Expert Guide To Edible Landscaping
Edible landscaping is one of the most practical forms of gardening, and when done right, can also be quite aesthetically pleasing.
Growing your own fruits, vegetables, and herbs allows you more control over the food you’re consuming and also allows you to be partially self-sustainable.
Over time, edible landscaping is also usually cheaper than store-bought produce, as you’re skipping the transport costs, packaging costs, labor costs, and so on, which are all factored into the final cost of store-bought produce.
For those looking to hire established landscapers, Louisville Landscape Pros will gladly help you set up your edible garden.
Otherwise, if you’re looking to learn how to be more self-sustainable, eat healthier, and cut down on food costs, let’s begin.
1. Is Your Space Suitable For Edible Landscaping?
First off, before you begin on your edible garden, you need to assess whether your space can actually be used for edible landscaping. And this is mainly going to boil down to the amount of sunlight your outdoor space has.
Most edible plants are going to need at least six hours of sunlight every day, and ideally, it should be strong, direct sunlight. So you need to observe your space and see where the sun shines throughout the day. Ideally, you should position your edible garden in the area that receives the most sunlight.
The strength of the sunlight matters too. 5 hours of strong sunlight is better than 6 hours of weak sunlight. So again, carefully observe your area for a few days and see which spots get the most and strongest sunlight.
In most cases, the more sunlight, the better, as most edible plants are meant to use as much sunlight as they can get. There are some exceptions, so it’s always good to check beforehand, but in the majority of cases, edible plants won’t ever have too much sunlight.
Sunlight is the main concern, but of course, don’t neglect the other conditions too. Make sure to also assess your region’s hardiness zone and soil makeup. Your soil can be amended to suit the growing environment of your edible plants, but either way, you’d have to do a soil test to see if changes need to be made.
Your hardiness zone, on the other hand, cannot be changed. You can try to create microclimates with walls, fences, shade structures, or greenhouses. But even then, it’s a lot more work than just amending soil.
So try to find edible plants that can suit your hardiness zone rather than trying to amend your hardiness zone to suit your edible plants.
2. Choosing The Edible Plants
Sometimes, you’ll see edible gardens that look plain and dull. But that’s not an issue with edible gardens itself, but the planning.
To have an aesthetically pleasing edible garden, needless to say, you need edibles of different colors. This shouldn’t be an issue unless you’ve got your mind set on specific plants that you want to use, which most people don’t.
If you’ve got one or two edible plants that you’re dead set on having, that’s still fine as long as you have a variety of other plants to add color.
If you really don’t care about aesthetics and just want to have the edibles for consumption, then you can just plant the ones you like. But for those who want an aesthetic edible garden, here are great choices for each type of edible.
Fruits
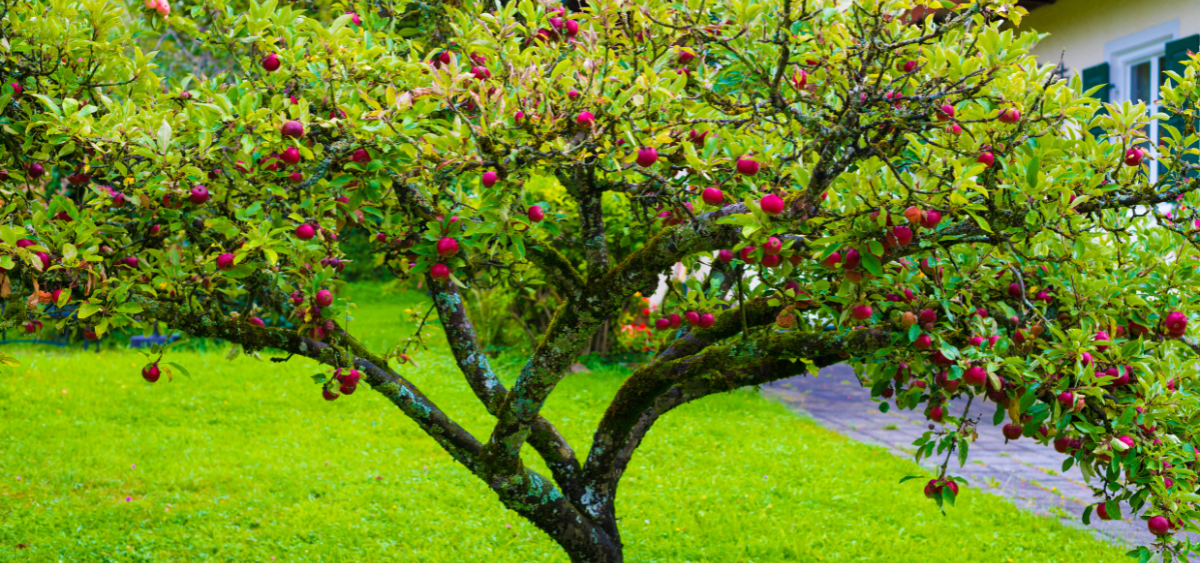
Fruits naturally have vibrant, stunning colors, so it’s no surprise that fruit trees are one of the most visually appealing edible plants you can have.
Some popular fruit trees are apple trees, peach trees, and citrus trees, all of which can serve as beautiful focal points for your edible landscape.
For the bushes, berry bushes are going to be your best bet. This inclues blueberries, blackberries, and raspberries.
Vegetables
For vegetables, nightshades are like the fruit trees of vegetables in the sense that their harvests have bright and vibrant colors. These include peppers, tomatoes, eggplants, and so on.
For adding color to the ground level, you’re going to want vegetables that grow underground, i.e. root vegetables. These include radishes, carrots, beets, and so on.
And finally, even leafy green vegetables also help add more lush greenery to your edible garden, so vegetables like lettuce and spinach, while being green, still help in aesthetic appeal.
Herbs
Now for herbs, the herb harvest are usually much smaller than fruits and vegetables. So while they can add color, they aren’t usually focal pieces, but instead function more like flowers, like complementary accents.
Since they’re not particularly striking, most herbs will contribute similarly to your aesthetic appeal in their subtle way. So just go for the herbs you like.
Herbs like thyme and basil are frequently used for cooking, while lavender and chamomile are great for tea or natural remedies.
Edible Flowers
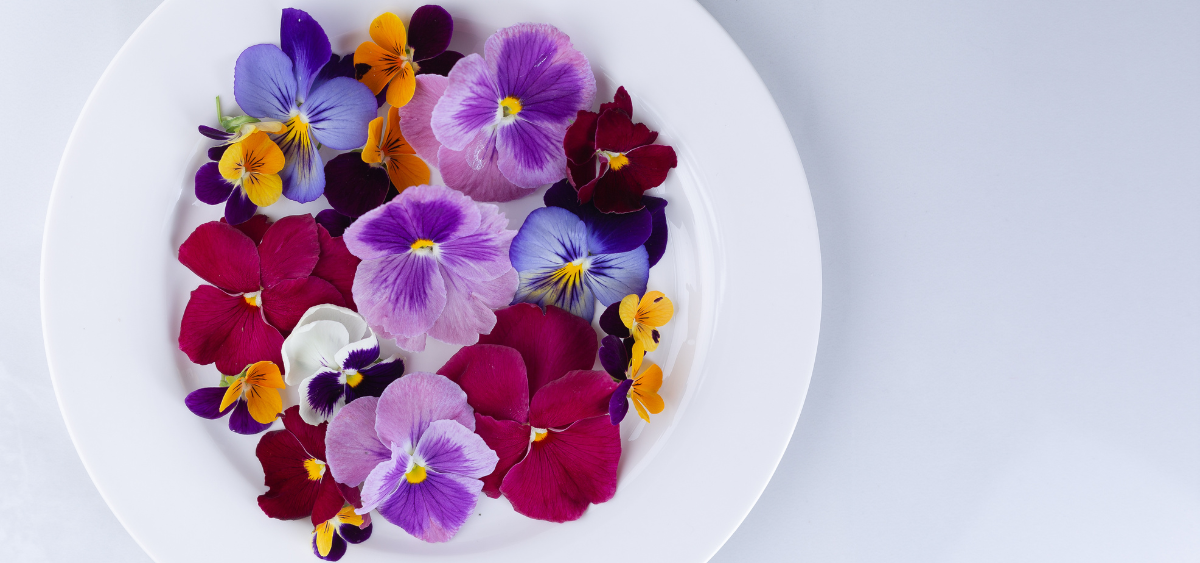
Finally, edible flowers are a category of flowers, which means, like flowers do, they add splashes of color to your edible garden, giving it life.
Calendula and pansies are top favorites for their bold, vibrant colors.
3. Common Challenges
Edible landscaping has a specific set of challenges, but fret not. We’ll be addressing them all here.
Balancing Aesthetics With Edible Plants
Although we provided some great examples of edible plants that can bring color and enhance your landscape’s aesthetic, you might be trying to achieve a certain landscaping style that may be hard to do, even with our recommendations.
To solve this issue, the solution is actually pretty straightforward. If you’re trying to do an entirely edible garden, it’s not always easy to find an edible plant to replace the plant you wanted to use for your landscaping style.
So instead of that, do a partial edible garden. You’re still reaping the benefits of edible gardens, just less. And if that helps you achieve your ideal landscaping style and makes you happy, it’s a reasonable trade-off.
Then, over time, you can look around for suitable edible plants to slowly replace each of your regular plants.
Limited Space
When your space is limited and you don’t have much space to grow plants, it can start to feel like there isn’t really a point. After all, what’s the point of caring for your garlic plant for the whole year only to collect a few cloves for all your effort and time?
And that is a very valid concern. But fortunately, even with limited space, you can actually grow more plants by maximizing your space.
Here are some ways to make the most out of limited space:
- Vertical gardening: Vertical gardens multiply whatever space you have by as many levels as your vertical garden has. If you have 5 levels to your 10ft by 2ft vertical garden, that’s 10ft by 2ft times 5.
- Hanging baskets: You may not have much space on the ground, but how about on your walls? Just hang a few baskets and pretty soon, their combined surface area will add up to match that of a small garden.
- Container-gardening: If you can’t fit a big garden on your flat ground, how about having a few mini gardens in the various small pockets of space you’re able to eek out? Container gardening allows you the flexibility to have multiple small gardens that can fit into small spaces and even be elevated onto structures like shelves.
So don’t let space be a limiting factor. With so many ways to tackle limited space, there’s really no excuse to let it stop you from having a (large) edible garden.
Chemical Use

Even with normal gardens, it’s already best to minimize chemical use, as they can be toxic not just to you, but to your plants and wildlife as well. But when it comes to edible gardening, chemical use is a huge no-no.
Just imagine the same chemicals that you used to kill pests in your garden getting into your edibles, and then you ingesting those chemicals into your stomach. Pretty scary right?
But when there are so many pests around, it can seem almost impossible not to use chemical pesticides and insecticides.
Well, actually, it requires more planning and work, but it’s quite doable, and definitely worth the time and effort investment when you consider that you could potentially be saving your own life and maybe even your family’s.
The key is to combine multiple strategies to effectively deal with pests without chemicals. Chemicals are the most effective for sure, but a holistic pest management strategy can be just as effective.
Here are the various chemical-free ways to deal with pests:
- Traps: Sticky traps and pheromone traps, as you’d expect, trap these pests, so they’re an effective way to get rid of pests without chemicals.
- Diatomaceous Earth: Diatomaceous Earth (DE) is sprinkled around problem areas and works by dehydrating pests and killing them. It’s non-toxic to both humans and your plants and other wildlife, so it’s another great chemical-free way to get rid of pests.
- Pest predators: This strategy will take a bit more time, but by growing plants that act as food sources for pest predators like ladybugs, you’ll encourage more of them to come to your garden and get rid of pests for you.
- Companion planting: Like encouraging pest predators, this strategy will take more time and isn’t an immediate solution. Certain plants, like marigolds, release compounds that repel certain pests. By growing these plants alongside your regular plants, your garden will naturally deter pests.
No single one of these strategies is as effective as directly spraying pesticides and insecticides of course. But by combining a few of these strategies, you’ll have a chemical-free pest management strategy that’s as effective as harmful insecticides and pesticides.
Conclusion
Alright, by now, you should have a much clearer idea of how to go about your edible landscape.
Edible gardens are like normal gardens, so there’s really not too much to worry about. Just maintain them as you would a regular garden, and before long, you’ll be munching on your fresh crop of carrots.
You might also like